ABOUT US
 HAIR EXTENSIONS
 BEST SELLING PRODUCTS
 Wig Hair
 WHOLESALE
 Contact us
 Sale Events
In the world of wigs and hair extensions, achieving that coveted natural look can be the key to an impeccable and confident appearance. One crucial technique that sets apart a professionally styled wig from the rest is knot bleaching. If you’ve ever wondered how celebrities and influencers seem to effortlessly flaunt their flawless locks, the answer might lie in this expertly executed process. In this comprehensive guide, we’ll delve into the art of knot bleaching, the pros and cons, and a complete step-by-step guide to bleaching the knots to elevate their appearance to mimic the realistic hairline of your dreams.
I. What Are Wig Knots?
The “wig knots” refer to the tiny knots of hair strands that are tied to the lace base of the wig during its construction. These knots hold the individual hair strands in place preventing hair fallout and excessive shedding. There are two popular types of wig knots: single knots and double knots. Let’s get familiar with both of these knot types below:
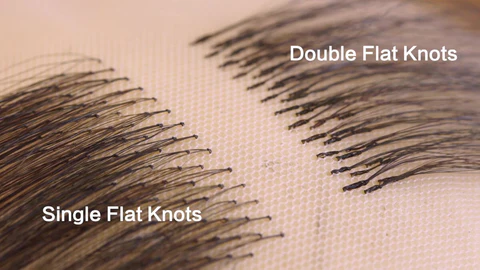
Single knots are knots made with one strand of hair, so they are the smallest knots you can get. The best thing about single knots is that they are barely noticeable, giving your wig hairline and part a very natural look. However, they are easy to shedding.
Double knots are knots made with two or more strands of hair. They are more noticeable than single knots and take a bit more effort to bleach than single knots. But, they are much stronger than single knots, so you can expect less shedding from a wig with double knots.
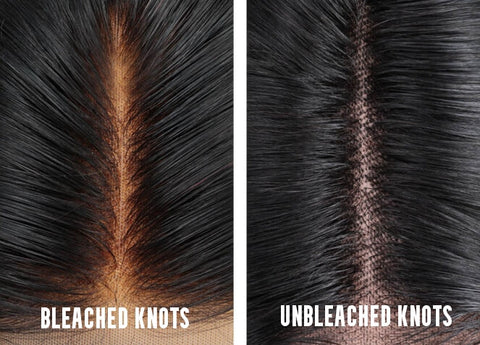
→ However, whether single or double knots, they are still visible and can give the wig an unnatural look, similar to small black dots scattered across the hairline. And bleaching the knots is the best way to make your lace wig look more natural.
II. How To Bleaching The Knots?
Knot bleaching is a crucial technique used to create a more natural and realistic appearance on lace-based wigs, closures, or frontal hairpieces. The primary goal of knot bleaching is to lighten or “bleach” these knots so that they become less visible against the scalp or skin tone. However, this process can completely ruin your wig if not done correctly. So how to bleach the knots in the right way? Let’s discover!
1. Gathering Tools For Bleaching The Knots
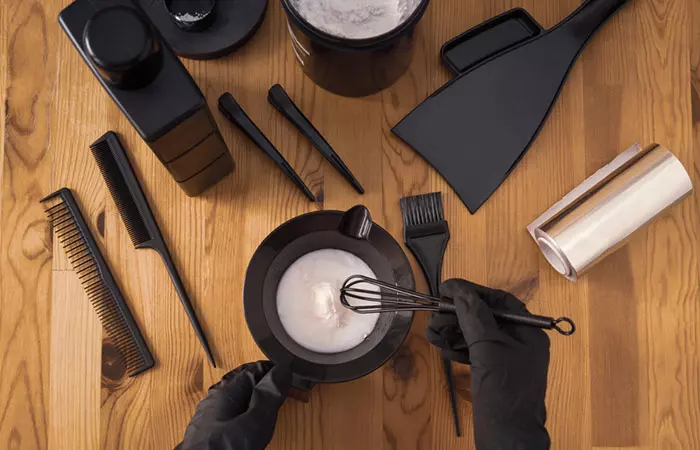
- A good quality powder-based hair bleach (adjust quantity as per the coverage area)
- 20 or 30-volume developer
- Mixing bowl (plastic or glass)
- 1-ounce measuring cup
- Hair color applicator brush
- Disposable gloves
- Aluminum foil
- Styrofoam head with T-pins and mount
2. What Ratio of Bleach to Developer Are Recommend?
Because only human hair wigs can be bleached, and the chemicals in the bleach can easily damage the strands. So you have to mix the developer and bleach according to the wig’s size.
- If you are bleaching only the frontal hairline, you should follow the 1:1 ratio, which means you will require one ounce each of bleach powder and the developer.
- If you are bleaching the entire base on a full cap wig, it is best to take three ounces each of bleach powder and developer
3. Steps-By-Step Guide To Bleaching The Knots
Bleaching The Knots Step #1: Tightly Secure The Wig
Spritz some water on the hair roots. This helps protect the roots in case the bleach seeps through the lace. Turn the wig inside out and secure it to the styrofoam head using T-pins. If it has baby hairs, make sure all the strands are secured well.
Step #2: Prepare The Bleach
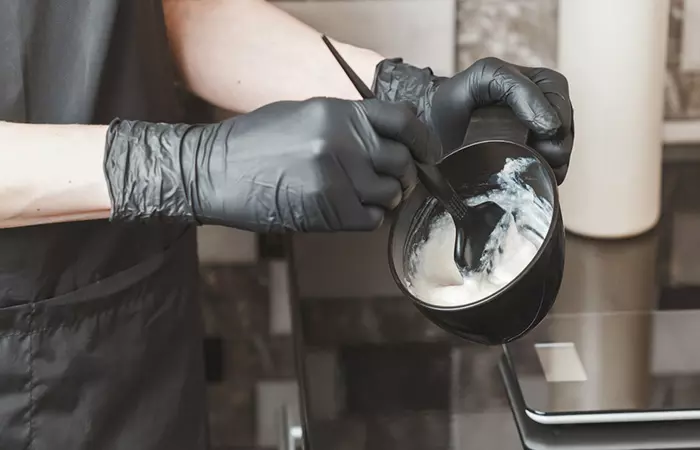
Put on your disposable gloves and mix the bleach and the developer. Follow the instructions on the product packaging for correct measurements. Stir the ingredients until the consistency turns thick and creamy. The mixture should not be runny. Otherwise, it may seep through the lace and affect the roots.
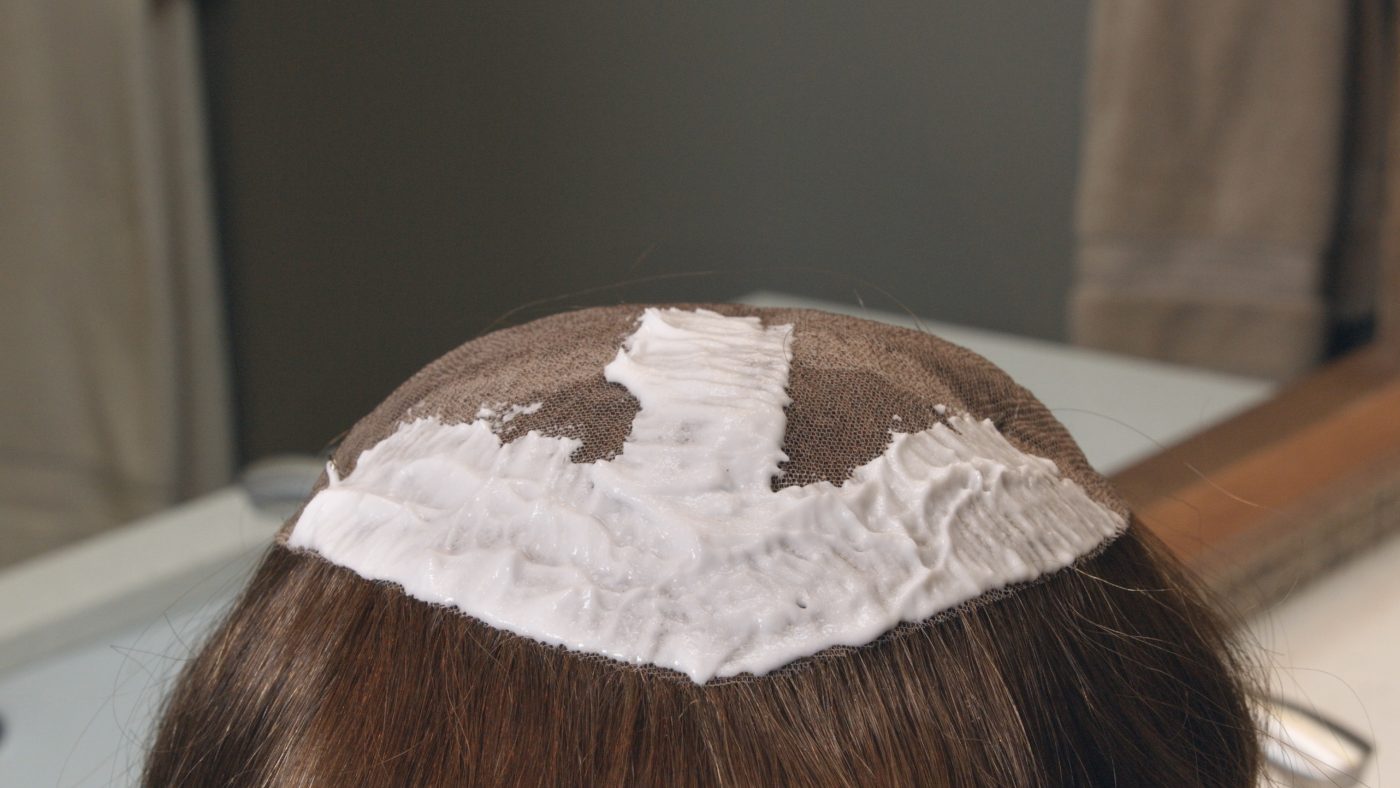
Bleaching The Knots Step #3: Apply The Bleach Mixture
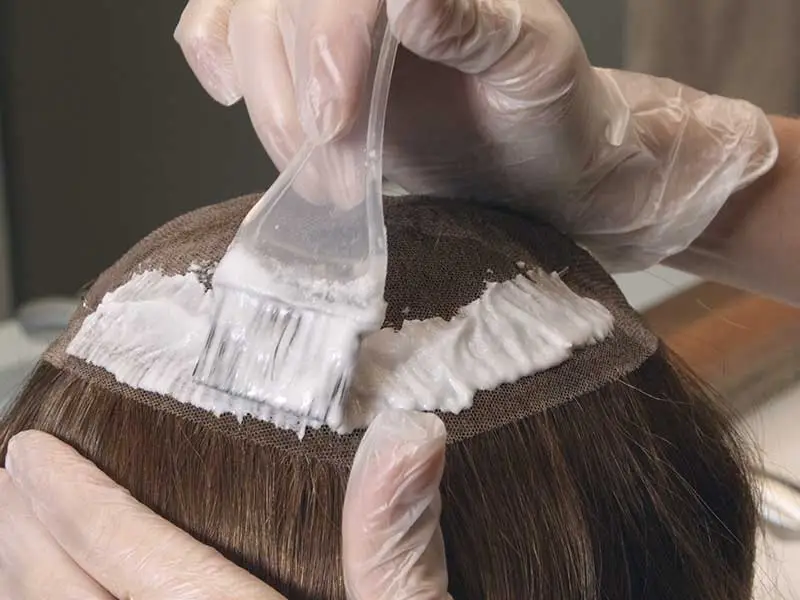
Apply the bleach mixture around the entire front hairline. Swipe the brush gently and avoid pressing hard to prevent it from seeping into the roots. Leave the bleach on your lace front for 15-20 minutes. Watch the knots closely. The time may vary depending on the hair, so keep a close eye.
Step #4: Rinse, Wash, and Dry The Hair
When the knots turn to your desired color, rinse the wig. You may use a purple shampoo to neutralize any brassiness. Apply a generous amount of conditioner, leave it on for several minutes, and wash it off. Then squeeze the excess water with a towel and air-dry the wig.
III. Bleaching The Knots - Advantages & Disadvantages
Although hair professionals always advise bleaching the wig knots, it is important to be aware of the advantages and disadvantages of the process. Understanding these pros and cons will help you make an informed decision before opting for this customization technique.
Advantages:
- Natural Hairline: The most significant advantage of knot bleaching is achieving a natural-looking hairline. By lightening the knots, the wig’s hairline appears as if the hair is growing directly from the scalp, creating a seamless and undetectable illusion.
- Realistic Appearance: A wig with bleached knots looks more realistic overall, as it eliminates the small black dots that can otherwise make the wig appear artificial or like a hairpiece.
Disadvantages:
- Risk of Damage: Bleaching involves using chemicals that can weaken the hair strands and the lace base of the wig. If not done correctly, over-bleaching or leaving the bleach on for too long can cause the hair to become brittle and prone to breakage.
- Not Suitable for All Wigs: Not all wigs are made with knots that can be effectively bleached. Some wigs may have overly dark lace or very tightly knotted hair, making the bleaching process less effective or even detrimental to the wig’s appearance.
IV. Important Tips To Keep In Mind When Bleaching The Knots
- Ensure that you mix the bleach and the developer in accurate proportions. Otherwise, it may create uneven results.
- The bleach mixture should be thick and creamy. If it is runny, the proportions are not right.
- Avoid oversaturating the wig closure with bleach to prevent bleaching the hair strands accidentally.
- Always go for the correct developer volume for bleaching knots. If you are a beginner, do not use a developer over 20 or 30 volumes.
- Brush and pin up all the baby hair and stray hair strands before bleaching the wig closure.
- Keep an eye on the knots as they develop a lighter shade. Rinse as soon they reach your desired shade.
V. Wrapping Up
Bleaching the knots is a beneficial technique to minimize the visibility of the closure, resulting in a more natural-looking hairline that resembles the scalp. If you want to try this at home, you can follow the guidelines provided in the article. However, it’s essential to proceed with caution and carefully follow the steps when applying bleach to the lace closure. Keep in mind that the bleaching process might vary slightly based on your hair texture and knot density.
To avoid any potential damage, it’s crucial not to leave the bleach on for more than 20 minutes. Over-bleaching can be harmful to the wig’s hair strands. After bleaching, it is advisable to wash the wig thoroughly and use a deep conditioner to maintain its longevity. Taking these precautions will help you achieve the desired natural finish while safeguarding the integrity of the wig.